

Smart TVs have transformed home entertainment by blending traditional television features with internet connectivity. However, as these devices become more advanced, they also become more vulnerable to software bugs, glitches, and performance issues.
If you’ve ever dealt with frozen screens, failed updates, or random system crashes—don’t worry. You can often fix these problems yourself using nothing more than a USB stick. This step-by-step 2025 guide will show you exactly how.
What You’ll Need Before You Begin
Fixing your smart TV with a USB stick isn’t as simple as just plugging it in—but it’s not difficult either. You only need a few items to get started:
- A USB flash drive (at least 2GB)
- Your smart TV’s model number
- The TV remote control

Tip: Any basic USB drive will work, provided it matches your TV’s USB port. Most TVs have USB-A (rectangular), though some newer models may have USB-C (rounded). For example, if your USB drive has both USB-C and USB-A, use the USB-A end if your TV doesn’t support USB-C.
You can also use an external hard drive or SSD as long as it connects properly to the TV.
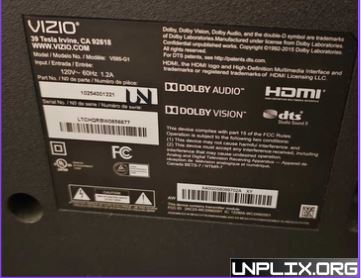
Finding Your TV’s Model Number:
Look for a sticker on the back of your TV, usually near the ports. Write down the model number—you’ll need it to download the correct firmware.
Why Use a USB Stick to Fix Your Smart TV?
A properly configured USB stick can:
- Install or reinstall firmware
- Remove malware or corrupted files
- Restore factory settings
- Recover from system errors
Brands like Samsung, LG, Sony, TCL, and Vizio provide official firmware updates that can be loaded onto a USB stick. This method is simple, cost-effective, and often faster than relying on customer support or repair services.
Read More: How to Turn Tablet Into Second Screen in 2025: Easy Guide for Everyone
Fix Your Smart TV With Just a USB Stick
Step 1: Format Your USB Stick
Before using your USB stick, you must format it to FAT32—the file system most smart TVs recognize.
⚠️ Important: Formatting will erase all files on the USB. Back up anything important first.
For Windows:
- Insert the USB stick into your PC.
- Open File Explorer and locate the drive.
- Right-click it and choose Format.
- Select FAT32 as the file system.
- Click Start and wait for the process to complete.
For macOS:
- Insert the USB stick into your Mac.
- Go to Finder > Applications > Utilities > Disk Utility.
- Select your USB drive under “External.”
- Click Erase at the top.
- Choose MS-DOS (FAT) (equivalent to FAT32).
- Confirm and let the process complete.
- Now your USB stick is ready for the firmware files.
Step 2: Download and Install the Firmware
- Go to your TV manufacturer’s official website.
- Search for your TV model and locate the firmware or software update section. You can learn more about how firmware works on Wikipedia.
- Download the ZIP file containing the firmware.
- Extract the contents directly to the root of your USB stick—do not place them in a separate folder.
Extracting the ZIP File:
- Windows: Right-click > Extract All… > Choose your USB stick as the destination.
- Mac: Double-click to unzip > Drag extracted files directly to the USB drive.
Once the files are copied, safely eject the USB stick from your computer.
Step 3: Update Your Smart TV via USB
- Turn on your smart TV.
- Insert the USB stick into the service port (not just any USB port).
- Your TV may automatically detect the firmware and begin updating.
If it doesn’t:
- Use your remote to go to Settings > Software Update.
- Select Update via USB.
⚠️ Important:
Do not turn off your TV during the update. It may restart on its own once the process completes. This step can resolve system lags, app crashes, and Wi-Fi connectivity problems.
Troubleshooting: Why Isn’t My USB Stick Working?
If your TV doesn’t recognize the USB stick:
- Ensure the stick is formatted to FAT32
- Confirm the firmware files are in the root directory
- Use the correct USB port, ideally the one labeled Service
- To test your ports, plug in a smartphone. If it charges or prompts for data transfer, it’s a data-capable port.
Extra Features: What Else Can a USB Port Do on Your Smart TV?
Your smart TV’s USB port is more powerful than you think. Here are some handy ways to use it:
1. Play Movies, Music, and Photos
Load your content onto a USB stick and enjoy offline entertainment—no buffering, no streaming required.
2. Install Apps or Play Games
Some TVs support installing games or apps from USB drives. You can also connect USB game controllers, racing wheels, or arcade sticks for a console-like experience.
3. Connect a Keyboard or Mouse
Typing on a TV remote is clunky. Use a USB keyboard or mouse for easier navigation and logging into apps.
4. Power Small Devices
USB ports can power streaming sticks, remotes, or small speakers—no extra wall plugs needed.
5. Record Live TV
If your TV supports PVR (Personal Video Recorder), you can record shows or movies directly to your USB stick.
6. Turn Your TV Into a Photo Frame
Display slideshows from family events or holidays. Just load your pictures onto the USB stick and plug it in.
7. Make Video Calls or Use Voice Control
Connect webcams or microphones to use video chat apps like Zoom or enable voice command features.
8. Watch Free Channels with USB Antennas
Plug in a USB antenna to access free local TV channels—ideal if you don’t have cable or internet.
Manually Updating Your TV – Summary
- Once your USB is formatted and loaded with the right firmware:
- Plug it into your TV’s service port
- Go to Settings > Software Update
- Select Update via USB
- Wait for the update to complete
- Your TV may restart automatically. Do not interrupt this process.
Frequently Asked Questions (FAQs)
1. Can all smart TVs be updated this way?
Most modern smart TVs support USB-based updates. Check your model’s manual to confirm.
2. Why won’t my TV detect the USB?
Make sure it’s formatted to FAT32 and files are in the root directory.
3. Can I download firmware from third-party sites?
No—only use the manufacturer’s official website to avoid viruses or bricking your TV.
4. How often should I update the firmware?
Check every 3–6 months or enable automatic updates if available.
5. What if my TV shuts off during an update?
This could damage the system. Use a UPS (uninterruptible power supply) to prevent power loss.
6. Will I lose my settings?
Some updates may reset settings. Back them up if possible.
7. Can I use my phone instead of a USB stick?
No. Most TVs require a USB flash drive for offline updates.
8. How do I know if the firmware file is corrupted?
If the TV fails to read it or crashes, re-download the file and try again.
9. Are there alternatives to USB updates?
Yes—some TVs support OTA (over-the-air) updates via Wi-Fi, but this requires a working system.
10. What if the USB update fails?
Contact the manufacturer’s support team or visit an authorized service center.
Conclusion
Fixing a smart TV is easier than ever—with just a USB stick. By following a few straightforward steps, you can resolve most issues without calling a technician or visiting a repair shop.
This method is safe, fast, and supported by major TV brands. From restoring software to boosting performance, a USB stick can do it all.
So before you give up on your TV, try this first. Your smart TV—and your wallet—will thank you.