

Smart TV constantly buffers or takes too long to load streaming apps, the issue might not be your internet speed but your DNS settings. DNS, or Domain Name System, plays a crucial role in how fast your TV connects to streaming services like Netflix, YouTube, and Prime Video. Adjusting these settings can significantly improve speed, eliminate buffering, and even help unlock region-restricted content.
This guide explains what DNS is, why it matters, and how to update DNS settings across various Smart TV brands for optimal streaming performance.
Also Read: How to Recover Hacked Steam Account in 2025
What is DNS?
DNS (Domain Name System) is like an internet translator. It converts website names into IP addresses that devices use to locate services online. By default, your Smart TV uses DNS servers provided by your Internet Service Provider (ISP), which may be slower or congested. Switching to faster, more reliable public DNS servers can enhance performance.
Benefits of Changing DNS Settings on Smart TV
- Faster Streaming: Public DNS services usually process requests faster than ISP DNS.
- Reduced Buffering: Smooth video playback without frequent interruptions.
- Access Geo-Blocked Content: Some Smart DNS services allow access to content restricted in your region.
- Improved Security: Premium DNS providers block malicious websites and protect your privacy.
- Stable Connection: Consistent performance, even during peak hours.
Recommended DNS Servers
Here are reliable and high-performance DNS servers you can use:
- Google DNS: 8.8.8.8 / 8.8.4.4
- Cloudflare DNS: 1.1.1.1 / 1.0.0.1
- OpenDNS: 208.67.222.222 / 208.67.220.220
Choose the one that performs best in your location.
How to Change DNS Settings on Popular Smart TVs
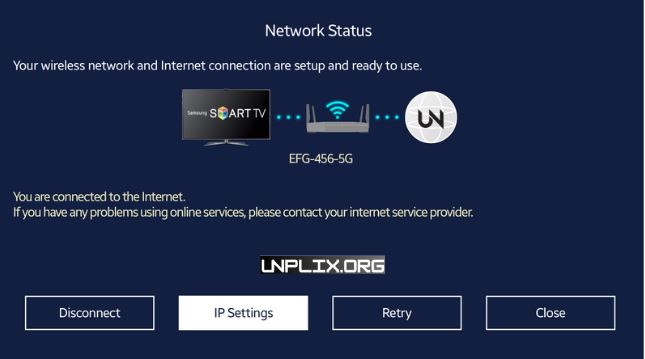
Samsung Smart Tv
- Press the Home button on your remote.
- Navigate to Settings > General > Network > Network Status.
- Select IP Settings.
- Choose DNS Settings > Enter Manually.
- Enter the DNS address and confirm.
- Restart your TV.
LG Smart TV (webOS)
- Press Settings on the remote.
- Go to All Settings > Network > Wi-Fi or Wired Connection.
- Click on Edit or Advanced Settings.
- Uncheck Set Automatically.
- Enter your preferred DNS.
- Apply and restart your TV.
Sony Smart TV (Android)
- Open Settings > Network & Internet.
- Select your active connection.
- Choose Advanced > IP Settings > Static.
- Enter IP address, Gateway, and DNS manually.
- Save settings and reboot.
Panasonic Smart TV
- Press Menu > Network > Network Connection > Custom Setup.
- Choose your network.
- Set DNS to Manual.
- Input the new DNS servers.
- Confirm and restart the TV.
Other Brands (TCL, Hisense, Vizio, etc.)
- Go to Settings > Network.
- Choose your connection type.
- Find IP/DNS settings and set to Manual.
- Enter DNS values.
- Save and restart your TV.
General Steps to Change DNS on Any Smart TV
- Open your TV’s Network Settings.
- Choose Wi-Fi or Ethernet, depending on your connection.
- Set IP configuration to Static.
- Input an IP address similar to your router (e.g., 192.168.1.100).
- Enter your router’s IP as the Gateway.
- Use 24 as the subnet prefix length (common).
- Enter primary and secondary DNS addresses.
- Save and restart your TV.
Tips for Best Results
- Use 5GHz Wi-Fi for faster wireless speeds.
- Restart your TV and router after changes.
- Clear app cache to refresh DNS settings.
- Don’t use VPN and Smart DNS together.
- Test multiple DNS servers to find the fastest one.
- Record original settings in case you want to revert.
Frequently Asked Questions (FAQs)
1. What happens when I change the DNS on my Smart TV?
It changes how your TV connects to streaming apps, potentially making them faster and more stable.
2. Can changing DNS improve video quality?
Yes. A faster DNS reduces load time and buffering, improving your viewing experience.
3. Is it safe to change DNS settings?
Yes. Trusted DNS providers are safe and often more secure than your ISP.
4. Will I lose internet access if I use the wrong DNS?
You may temporarily lose connection. You can fix it by switching back to automatic DNS.
5. Which DNS is best for streaming?
Cloudflare and Google DNS are top choices for speed and reliability.
6. Can DNS changes unlock region-restricted content?
Yes, if you use Smart DNS services that support content unblocking.
7. Does changing DNS affect all apps?
Yes, it influences all internet-based features on your Smart TV.
8. How do I go back to the original DNS?
Switch DNS settings from Manual to Automatic in your TV’s network menu.
9. Should I change DNS on my TV or router?
Changing it on your router applies it to all devices in your home.
10. Will DNS changes affect my internet bill?
No. Changing DNS settings does not impact your data usage or billing.
Conclusion
Changing your Smart TV’s DNS settings is a simple yet effective way to boost streaming speed, enhance security, and unlock more content. With just a few adjustments in the settings menu, you can enjoy a smoother, buffer-free entertainment experience—no need for new hardware or faster internet plans. If you stream frequently, updating your DNS is a small effort with big rewards. Give it a try—you can always revert if needed.